Simple Gallery App with Grid Layout & Custom Dialog box - Android Studio 2019
- Haseeb Hussain

- May 19, 2019
- 4 min read
Updated: May 24, 2019

In this tutorial you get to know that how to use grid view and add a view to it and how to create a custom dialog box. Lets start...
1. Create a android project name it what suits you best.
2. add some images to drawable folder by simply copy the picture and paste it to drawable folder.
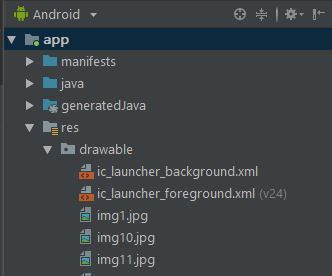
Note: image names must be small in letters and don't use spaces in image names.
3. Create an array list in MainActivity.java class which hold the IDs of your images you just have pasted in drawable folder.
ArrayList<Integer> mImageIds = new ArrayList < >(Arrays.asList( R.drawable.img1,R.drawable.img2,R.drawable.img3,R.drawable.img4, R.drawable.img5,R.drawable.img6,R.drawable.img7,R.drawable.img8, R.drawable.img9,R.drawable.img10,R.drawable.img11,R.drawable.img12 ));
the syntax of identifying you image in drawable folder is R.drawable.<image_name>. Notice that the image name is without extension exmple (.jpg).
4. Add a gridview in mainactivity.xml file.
<GridView android:id="@+id/myGrid" android:layout_width="match_parent" android:layout_height="match_parent" android:columnWidth="100dp" android:numColumns="auto_fit" android:verticalSpacing="10dp" android:horizontalSpacing="10dp" />
5. Now identify this gridview in MainActivity.java class.
GridView gridView = findViewById(R.id.myGrid);
add the code above inside the onCreate method of MainActivity.java class.
6. In order to add the images in gridview you need to define a view for each item in the gridview and use a adapter to set the view into gridview. First create a new class named it ImageAdaptor and then extend this class with BaseAdapter. After this add the code below inside the ImageAdaptor class.
private List<Integer> mThumbIds; private Context mContext; public ImageAdaptor(List<Integer> mThumbIds, Context mContext) { this.mThumbIds = mThumbIds; this.mContext = mContext; } @Override public int getCount() { return mThumbIds.size(); } @Override public Object getItem(int position) { return null; } @Override public long getItemId(int position) { return mThumbIds.get(position); } @Override public View getView(int position, View convertView, ViewGroup parent) { ImageView imageView = (ImageView) convertView; if(imageView == null){ imageView = new ImageView(mContext); imageView.setLayoutParams(new GridView.LayoutParams(350,450)); imageView.setScaleType(ImageView.ScaleType.CENTER_CROP); } imageView.setImageResource(mThumbIds.get(position)); return imageView; }
This code has private variable which holds the context and a private list which stores the list of all the images IDs and a parameterize constructor and four methods.
getCount() - returns the number that how many time the adapter executes.
getItemId() - returns the id of the item which is click on the gridview.
getView() - here the actual view is specified i.e. in each grid item what is and how it to be shown, in this case a simple imageview is created.
7. Now just set the adapter for gridview in onCreateMethod of MainActivity.java class.
gridView.setAdapter(new ImageAdaptor(mImageIds,this));
and then add a ItemClickListener which will execute when an item is clicked on the GridView.
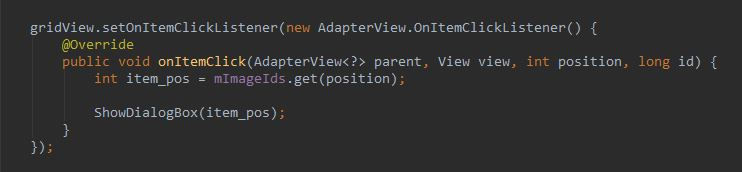
gridView.setOnItemClickListener(new AdapterView.OnItemClickListener() { @Override public void onItemClick(AdapterView<?> parent, View view, int position, long id) { int item_pos = mImageIds.get(position); } });
on onItemClick() method we just use the get() method to get the ID of clicked item.
8. To view a custom dialog box we need to create a view for custom dialog box. So create a xml file name it custom_dialog and paste the code below.
<?xml version="1.0" encoding="utf-8"?> <RelativeLayout xmlns:android="http://schemas.android.com/apk/res/android" android:layout_width="match_parent" android:layout_height="match_parent" android:layout_gravity="center" android:layout_margin="10dp" > <TextView android:id="@+id/txt_Image_name" android:layout_width="match_parent" android:layout_height="wrap_content" android:text="Image Name" android:gravity="center" android:textSize="20sp" /> <ImageView android:id="@+id/img" android:layout_width="match_parent" android:layout_height="wrap_content" android:layout_below="@+id/txt_Image_name" android:scaleType="centerCrop" android:src="@mipmap/ic_launcher_round" /> <LinearLayout android:layout_width="match_parent" android:layout_height="wrap_content" android:orientation="horizontal" android:layout_below="@+id/img" > <Button android:id="@+id/btn_full" android:layout_width="0dp" android:layout_height="match_parent" android:layout_weight="1" android:text="Full View" android:textColor="#fff" android:background="@color/colorPrimary" /> <Button android:id="@+id/btn_close" android:layout_width="0dp" android:layout_height="wrap_content" android:text="Close" android:textColor="#fff" android:background="#000" android:layout_weight="1" /> </LinearLayout> </RelativeLayout>
Now set the view to a dialog box. For this create a method inside the MainActivity class of MainActivity.java. Paste the code below to create a method.
public void ShowDialogBox(final int item_pos){ final Dialog dialog = new Dialog(this); dialog.setContentView(R.layout.custom_dialog); //Getting custom dialog views TextView Image_name = dialog.findViewById(R.id.txt_Image_name); ImageView Image = dialog.findViewById(R.id.img); Button btn_Full = dialog.findViewById(R.id.btn_full); Button btn_Close = dialog.findViewById(R.id.btn_close); String title = getResources().getResourceName(item_pos); //extracting name int index = title.indexOf("/"); String name = title.substring(index+1,title.length()); Image_name.setText(name); Image.setImageResource(item_pos); btn_Close.setOnClickListener(new View.OnClickListener() { @Override public void onClick(View v) { dialog.dismiss(); } }); btn_Full.setOnClickListener(new View.OnClickListener() { @Override public void onClick(View v) { } }); dialog.show(); }
This code will show up the dialog box when the user select an image on gridview.
9. In the dialog box we have two buttons, one to close the dialog box and another one to open a new activity which shows the full view of the image for that create a new empty actvity name it FullView.
10. Remove the toolbar from full_view.xml file:
In order to remove the toolbar we need to define a new theme for that activity. Theme are defined in res/values/styles.xml file. So add the code below inside the resource tag of styles.xml file.
<style name="fullViewTheme" parent="Theme.AppCompat.Light.NoActionBar"> <item name="colorPrimary">@color/colorPrimary</item> <item name="colorPrimaryDark">@color/colorPrimaryDark</item> <item name="colorAccent">@color/colorAccent</item> </style>
No apply this theme to FullView activity inside the AndroidManifest.xml file. Using the android:theme attribute in the activity tag of FullView.

11. Add a imageview in full_view.xml file. Paste the following code inside the full_view.xml file.
<?xml version="1.0" encoding="utf-8"?> <RelativeLayout xmlns:android="http://schemas.android.com/apk/res/android" xmlns:app="http://schemas.android.com/apk/res-auto" xmlns:tools="http://schemas.android.com/tools" android:layout_width="match_parent" android:layout_height="match_parent" tools:context=".FullView"> <ImageView android:id="@+id/img_full" android:layout_width="match_parent" android:layout_height="match_parent" android:src="@mipmap/ic_launcher_round" android:scaleType="fitXY" /> </RelativeLayout>
Now identify the ImageView in the FullView.java class.
ImageView imageView = findViewById(R.id.img_full);
12. Now we need to set the action of full View button to start a FullView activity when clicked, so write the following code inside the onClick() method of btn_Full to start the activity.

This code has a object of Intent which is used to start an Activity. putExtra() method is used to send image id to next activity which shows the clicked image. This method has two parameters one is the key to identify the value and second is the actual value to be stored.
Now we need to get the image ID inside the FullView.java class to show the image. For that paste the following code inside the onCreat() method of FullView.java.
int img_id = getIntent().getExtras().getInt("img_id"); imageView.setImageResource(img_id);
This code will get the image id from Extras and set the image resource.
13. Now finally we just need to call the ShowDialogBox(item_pos) method inside the onItemClick() method of Gridview like that
Now just run the application to check. Hope you enjoy and understand the explanation. Take Care!
Video tutorial.

Comments