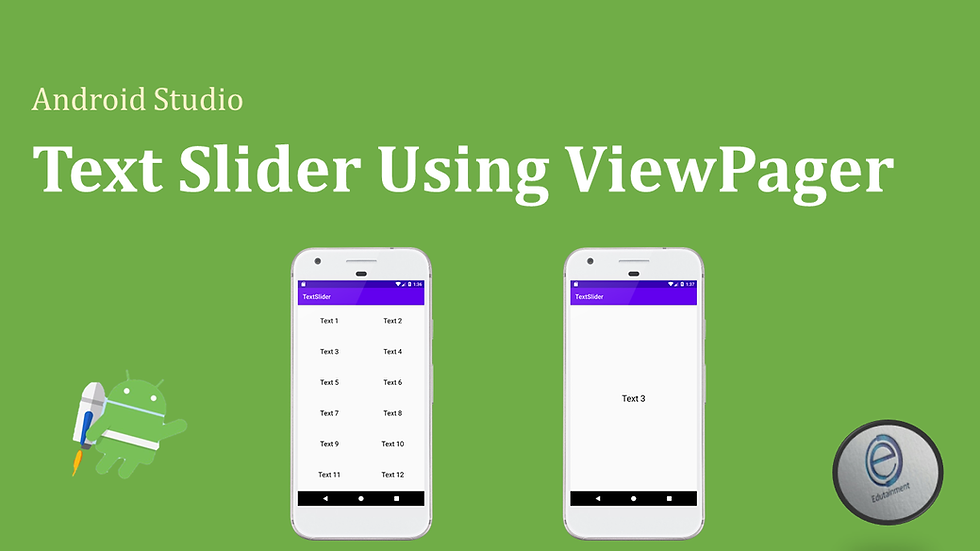
Text Slider Using Viewpager and Fragments
- Edu Tainment
- Dec 6, 2020
- 4 min read
Updated: Sep 29, 2021

- Create a new project name it TextSlider.
- Copy and paste the code in activity_main.xml file to create a Gridview to show the text in GridView.
 <?xml version="1.0" encoding="utf-8"?>
<LinearLayout xmlns:android="http://schemas.android.com/apk/res/android"
    xmlns:app="http://schemas.android.com/apk/res-auto"
    xmlns:tools="http://schemas.android.com/tools"
    android:layout_width="match_parent"
    android:layout_height="match_parent"
    tools:context=".MainActivity">

    <GridView
        android:id="@+id/gridview"
        android:layout_width="match_parent"
        android:layout_height="match_parent"
        android:numColumns="2"

        />

</LinearLayout>
- Now copy paste the code below in MainActivity.java
package com.example.textslider;

import androidx.appcompat.app.AppCompatActivity;

import android.os.Bundle;
import android.widget.GridView;

import java.util.ArrayList;

public class MainActivity extends AppCompatActivity {

    GridView mGridView;
    Adaptor adaptor;
    ArrayList<String> list;

    @Override
    protected void onCreate(Bundle savedInstanceState) {
        super.onCreate(savedInstanceState);
        setContentView(R.layout.activity_main);

   // initialize array list and add data to it to show in the gridview
        list = new ArrayList<>();
        list.add("Text 1");
        list.add("Text 2");
        list.add("Text 3");
        list.add("Text 4");
        list.add("Text 5");
        list.add("Text 6");
        list.add("Text 7");
        list.add("Text 8");
        list.add("Text 9");
        list.add("Text 10");
        list.add("Text 11");
        list.add("Text 12");

       // initialize the gridView
        mGridView = findViewById(R.id.gridview);
        // create the object of Adaptor Class
        adaptor = new Adaptor(list,this);
        // set the adaptor to gridView
        mGridView.setAdapter(adaptor);

    }
}
- Create a layout resource file for GridView items.
- To create a file right click on res / layout go to
New / Layout Resource File and name it list_item and paste the code below in the created file.
<?xml version="1.0" encoding="utf-8"?>
<LinearLayout xmlns:android="http://schemas.android.com/apk/res/android"
    android:layout_width="match_parent"
    android:layout_height="match_parent"
    android:orientation="vertical">

    <TextView
        android:id="@+id/text"
        android:layout_width="match_parent"
        android:layout_height="wrap_content"
        android:layout_gravity="center"
        android:gravity="center"
        android:padding="35dp"
        android:text="Hello World"
        android:textColor="#000"
        android:textSize="22sp"
        />

</LinearLayout>
- create a class named Adaptor.
- This class is used to populate data to GridView to do so copy paste the code below
package com.example.textslider;

import android.content.Context;
import android.content.Intent;
import android.view.LayoutInflater;
import android.view.View;
import android.view.ViewGroup;
import android.widget.BaseAdapter;
import android.widget.TextView;

import java.util.ArrayList;

public class Adaptor extends BaseAdapter {

    ArrayList<String> list;
    Context mContext;

    // parameterized constructor
    public Adaptor(ArrayList<String> list, Context mContext) {
        this.list = list;
        this.mContext = mContext;
    }

    @Override
    public int getCount() {
       // return the count that how many times the adaptor class
 //executed
        return list.size();
    }

    @Override
    public Object getItem(int position) {
        return null;
    }

    @Override
    public long getItemId(int position) {
        return 0;
    }

    @Override
    public View getView(final int position, View convertView, ViewGroup parent) {
        // here we define the view of GridView layout and its actions
        if(convertView == null)
        {
            convertView = LayoutInflater.from(mContext).inflate(R.layout.list_item,parent,false);
            // getting the textView inside the list_item.xml file.
            TextView textView = convertView.findViewById(R.id.text);
            textView.setText(list.get(position));
            // set onclick listener, when clicked SliderActivity will
           // be opened
            convertView.setOnClickListener(new View.OnClickListener() {
                @Override
                public void onClick(View v) {
//                    from here we pass the list to SliderActivity Class
                    Intent i = new Intent(mContext,SliderActivity.class);
//                    passing the list and current clicked item position
                    i.putExtra("list",list);
                    i.putExtra("current",position);
//                    this will open up the TextFragment Class on click
                    mContext.startActivity(i);
                }
            });
        }
        return convertView;
    }
}
- now create new activity name it SliderActivity which used the Viewpager to show the slider using fragments.
- copy paste the code below in activity_slider.xml file
.<?xml version="1.0" encoding="utf-8"?>
<LinearLayout xmlns:android="http://schemas.android.com/apk/res/android"
    xmlns:app="http://schemas.android.com/apk/res-auto"
    xmlns:tools="http://schemas.android.com/tools"
    android:layout_width="match_parent"
    android:layout_height="match_parent"
    tools:context=".SliderActivity"
    android:orientation="vertical"
    >

    <androidx.viewpager.widget.ViewPager
        android:id="@+id/pager"
        android:layout_width="match_parent"
        android:layout_height="match_parent"/>


</LinearLayout>
- and paste the code below in SliderActivity.java class
package com.example.textslider;

import androidx.appcompat.app.AppCompatActivity;
import androidx.viewpager.widget.ViewPager;

import android.os.Bundle;

import java.util.ArrayList;

public class SliderActivity extends AppCompatActivity {

    ViewPager mPager;
    TextFragmentAdaptor adaptor;
    ArrayList<String> list;
    int current;
    @Override
    protected void onCreate(Bundle savedInstanceState) {
        super.onCreate(savedInstanceState);
        setContentView(R.layout.activity_slider);

        mPager = findViewById(R.id.pager);
//        initialize the TextFragmentAdaptor
//        the constructor required a list so we need to get the list here which we send from Adaptor.java class.
        list = getIntent().getStringArrayListExtra("list");
        current = getIntent().getIntExtra("current",1);
        adaptor =  new TextFragmentAdaptor(getSupportFragmentManager(),list);
        mPager.setAdapter(adaptor);
//        now set the current Item of pager
        mPager.setCurrentItem(current);
    }
}
- inorder to show the slider we use fragments to firstly create a Blank Fragment by right clicking on res / layouts and go to New / Fragments / Fragment (Blank).
- it will create and xml file and a java file.
- paste the code below to fragment_text.xml file.
<?xml version="1.0" encoding="utf-8"?>
<RelativeLayout xmlns:android="http://schemas.android.com/apk/res/android"
    xmlns:tools="http://schemas.android.com/tools"
    android:layout_width="match_parent"
    android:layout_height="match_parent"
    tools:context=".TextFragment">

    <!-- TODO: Update blank fragment layout -->
    <TextView
        android:id="@+id/fragment_text"
        android:layout_width="match_parent"
        android:layout_height="match_parent"
        android:text="@string/hello_blank_fragment"
        android:layout_centerInParent="true"
        android:gravity="center"
        android:textSize="28sp"
        android:textColor="#000"
        />

</RelativeLayout>
- paste the code below to TextFragment.java class
package com.example.textslider;

import android.os.Bundle;

import androidx.fragment.app.Fragment;

import android.view.LayoutInflater;
import android.view.View;
import android.view.ViewGroup;
import android.widget.TextView;

public class TextFragment extends Fragment {

    TextView mTextView;

    @Override
    public View onCreateView(LayoutInflater inflater, ViewGroup container,
                             Bundle savedInstanceState) {
        // Inflate the layout for this fragment
        View v = inflater.inflate(R.layout.fragment_text, container, false);
        mTextView = v.findViewById(R.id.fragment_text);

//        now get the current fragment text which we passed using bundle
        String text = getArguments().getString("current");
//        now set the text to TextView to show
        mTextView.setText(text);

        return v;
    }
}
- now we need a Fragment Adaptor to set the Fragments to Viewpager
- create a new class name it TextFragmentAdaptor and paste the below code in it.
package com.example.textslider;

import android.os.Bundle;

import androidx.annotation.NonNull;
import androidx.fragment.app.Fragment;
import androidx.fragment.app.FragmentManager;
import androidx.fragment.app.FragmentStatePagerAdapter;

import java.util.ArrayList;

public class TextFragmentAdaptor extends FragmentStatePagerAdapter {

    ArrayList<String> list;

    public TextFragmentAdaptor(@NonNull FragmentManager fm,ArrayList<String> list) {
        super(fm);
        this.list = list;
    }


    @NonNull
    @Override
    public Fragment getItem(int position) {
        TextFragment fragment = new TextFragment();

//        send data through this fragment using bundle
        Bundle b = new Bundle();
//        send the current fragment text using position attribute
        b.putString("current",list.get(position));

//        set arguments
        fragment.setArguments(b);

//        return the fragment
        return fragment;
    }

    @Override
    public int getCount() {
//        specify the counter of fragment adaptor that how many times it will executed
        return list.size();
    }
}
- here you have all the code. Run a test the application. If you have any query aur need new tutorial please do let me know in the comments aur chat.
All The Best.

Comments